Polarizing Filters

I was asked about polarizing filters recently.  I usually have one with me when I travel.  By usually, I mean that it’s usually in my bag except when I really need it, but that’s another story…

Polarizing filters can do some great things – reduce or eliminate glare, enhance colors, and manage reflections.  If you want more on the how and why of a polarizing filter, click here.

So, when would you want to have a polarizing filter with you?

Here’s a list to consider:

  • Taking a bus or train or plane trip where you’ll be shooting through windows.
  • Shooting shiny or glossy objects in bright sunshine or under bright lights.
  • Heading to the beach.
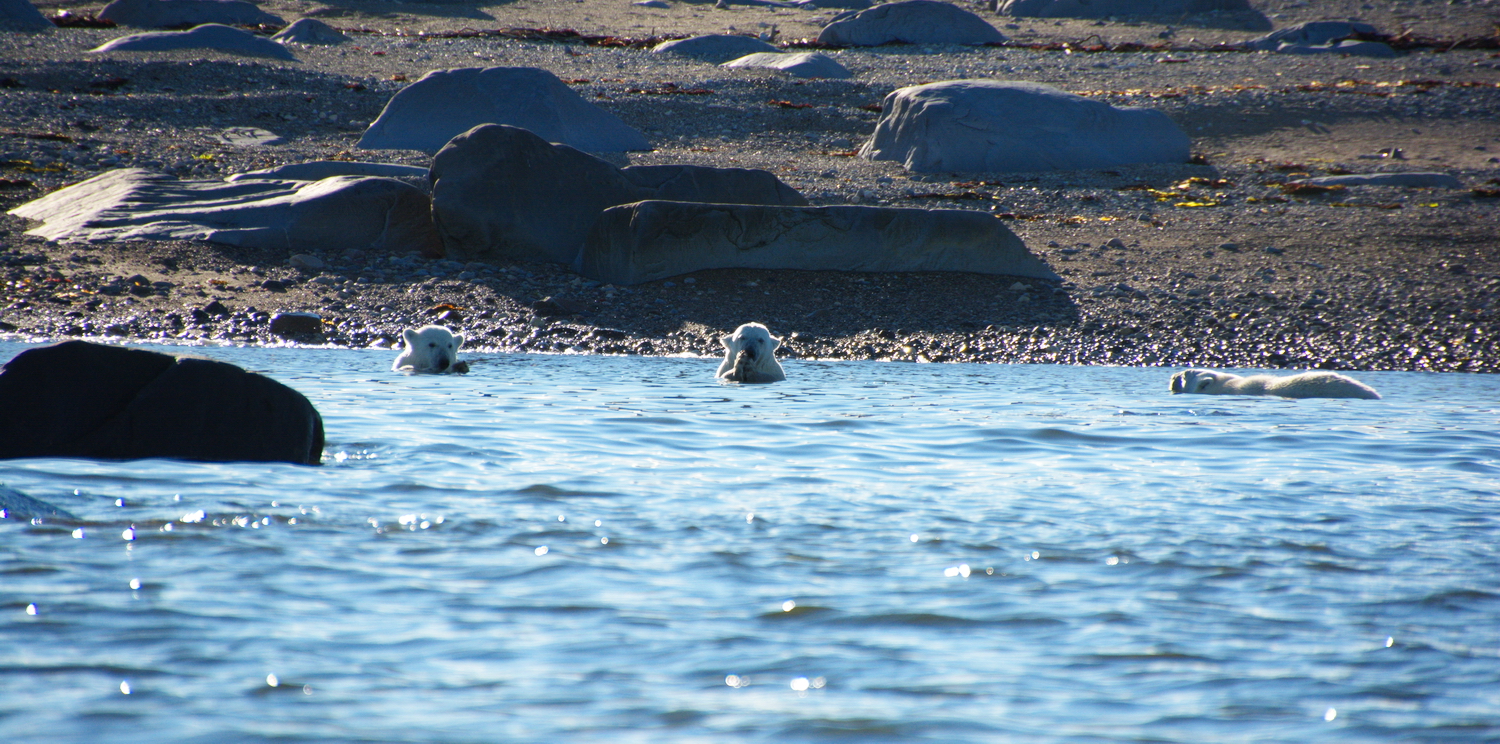
  • Shooting things on or in the water.
  • Photographing colorful things like fall foliage on a cloudy/hazy day.
  • When you’re going to have to deal with reflections on a glass/clear/glossy surface.
  • When you’re shooting in stark sunlight or mid-day.

In other words, they’re not a bad thing to have in your bag.  All of the time…

One thing to remember is that any time you have a filter on your lens,  there’s a chance for internal reflections between the surface of the filter and the lens.  These reflections can be good – or they can ruin a shot.

The photo below shows a polarizing filter used to help bring out the colors on a gray day, and it shows an unintended “star” effect from the filter.  In this case, the star effect on the headlight and ditch lights arguably helps make this picture.  It wasn’t something I set out to do – but it works in this case.

I had to take a breath and a step back, because I wasn’t happy with this as a “train” picture.  For most people, it seems that this is a fall foliage picture that happens to have a train in it, and the star effect adds to the picture.  The law of Unintended Consequences reinforces the fact that we all see different things in the same picture.

DSCF5580 LF FB

For more examples of a polarizing filter used to enhance fall colors (that would look great on your wall, or on a mug), check out this gallery on Laughing Frog Images.

If you’re interested in getting a polarizing filter for your camera bag, start with your local camera store!  Without your patronage, we won’t have them – and we need small businesses like them!

Happy shooting!

Your friend the Neutral Density Filter

Ever wonder how a photographer made an image in which the water flows like smooth liquid?  And the image was made during the day?  And you’ve tried – but you can’t do the same thing!

Well, it’s time to meet your new friend the neutral density filter.

What’s a neutral density filter?  Well, in really simple terms, it eats light.  Well, not really, but what it does is cut down on the amount of light that ultimately gets to your image sensor or film.  Or, you can simply just say it eats light.  This allows you to increase your shutter speed to get that flowing effect and to increase your depth of field to get more detail in your image.  If you want all of the technical info – check out this link to Wikipedia for all the tech stuff.

In order to use a neutral density filter, your camera at least needs (1) the ability to mount a filter and (2) a “M” [manual], “A” [aperture] or “S” [shutter speed] setting so you can adjust things.  And, there are a couple of other things that you’ll need that are really, really, really, important: (3) a tripod, and (4) a remote control or a remote/cable release.  (Nobody is that steady….)  If your camera can’t take a remote control or a remote/cable release and it has a self-timer, you’re in business – use the self-timer in place of the remote control or remote/cable release.

Does a ND filter work on the Automatic (a.k.a. “idiot-proof”) setting?  Honestly, I don’t know, as I’ve never tried that – but I don’t see why it wouldn’t, at least from a process standpoint.  I’ve always sought to get the longest possible shutter speed in conjunction with the highest (smallest) aperture I can when using a neutral density filter and used “M” or “S”.  If anyone out there has the answer to this question – let us know!

If you’re curious, the Frog has the following ND filters: 0.3, 0.6, 0.9 and 1.8 in various sizes.  You can stack them to increase the effect, but image quality may be compromised.  In general, the fewer things you have on the front of your lens, the better.  I tend to limit the number of things on the front of my lens to exactly one (1).  If you’re shooting with a DSLR or an advanced hybrid and wanted to get just one – I’d go for a 0.9 at minimum.

I have a 62mm variable ND filter for when I’m traveling light with just my 18-270mm Tamron, but I have yet to use it.  Some love them, and some hate them.  I’ll let you know what I think when I finally get a chance to use mine.

The image below of the Merced River as it flows east out of the Yosemite Valley was taken at 5:45PM.  Without the neutral density filter, this would have been impossible.  However, with the 1.8 neutral density filter and an ISO of 100, it was possible to take a 10-second exposure at f29 to get the resulting image.  (Hint: it looks great as a metal print!  Or a print on Fuji Pearl paper!)  The camera was a Nikon D5100, and the lens a Sigma 70-200mm f2.8.  I had the big tripod along for the trip (the “Mother Pod”) as this is a heavy lens, and used a cable release.

DSC_1511 LFI


These critters aren’t necessarily cheap.  If you’re going to get a neutral density filter, get the best one you can afford.  While you may not need the most expensive one out there, if there’s a significant price difference – go to your local camera store and/or read the reviews and consider the comments.  If the price is too good to be true, it probably is.  And… if your filter has a flaw, so will your image.

This image can be found in the Laughing Frog Images’ galleries by simply clicking here.  It would look great on your wall.  Or on your water bottle.  Or on your coffee mug.  Well, it’d probably look great however you’d like to get it!


Our Silent Partner

As some of you might have wondered or figured out, there’s no way that those of us at Laughing Frog Images could make all of the products that we offer for purchase.

We’re good, but just not that good.

When Laughing Frog Images was in it’s fantasy / planning stage, several different fulfillment partners were explored.  Some offered things that others didn’t.  Pricing varied.  Terms varied.  Background services varied.  So, the search and discovery went on.  And off.  And on again for a couple of years.

When it came time to get real and launch Laughing Frog Images, Zenfolio was chosen as our Silent Partner.

Laughing Frog Images is based upon two simple premises:

  1. Photographic art should be affordable to everyone who wants it.
  2. You should be able to get the image that you want the way that you want it.

Product offerings, pricing, and background services were key factors in the decision, but ultimately quality and services to the customer were the final factors.  For example – it you want a print, but the source image isn’t capable of making that size print, the website tells you that and won’t let you order it.  I’d rather have that happen than someone ordering a print that looks like was the by-product of a six pack for lunch.

And there you have it, the story behind how a teeny, tiny, small, little enterprise can offer you so many ways to make an image yours.

Check Laughing Frog Images out if you haven’t been there in a while.  You can get something for yourself or beat the stress of holiday shopping by getting something for everyone on your list!

Western Pacific Railroad Museum

The Feather River Express laid over in Portola, CA for two nights, giving The Frog a full day to explore Portola Railroad Days and the Western Pacific Railroad Museum in Portola.

The Western Pacific Railroad Museum is one of the more notable railroad museums in that they not only have a great collection of locomotives,  but also passenger and freight cars from the Western Pacific and connecting lines.  And – you can also rent a locomotive and be an engineer for an hour or two.  Who out there can honestly say they never wanted to run a locomotive?  Who, I ask!

The Western Pacific Railroad ran between Salt Lake City / Ogden Utah and Oakland, CA.  It was acquired by the Union Pacific Railroad in 1983.

The Western Pacific Railroad Museum Gallery is a reminder that there was a time before graffiti, and that railroads did paint things other than black and red.  Railroads even had slogans in those days!  And, who knew that the Strategic Air Command had command centers on the rails?

Great museum. Great area.  What else can be said?

For a look at the sights and sounds of modern railroad power in 1952, as well as a look at passenger cars from that era, check out a few short video clips on Laughing Frog’s YouTube channel.

This is a view-only gallery (at least at this time).

If you like what you see, consider making a visit to the Western Pacific Railroad Museum to experience it for yourself, or at least make a donation so that others can continue to enjoy the museum and the artifacts for decades to come.


Remember.

Wide angle view of the Lower Manhattan skyline from the Staten Island Ferry.  June 2010.

The cranes you see about 1/3 in from the left are working on the new World Trade Center that will come to dominate the skyline.

DSCF6859 1-3 acd LF

Remember.

A Week in New Hampshire

Following on the Weekend in New Hampshire post, here’s an actual itinerary from an October trip in which Mrs. Frog was introduced to what a “real” fall is.  We were very fortunate and timed the fall foliage almost perfectly.  This was even more remarkable given that the airline tickets were purchased in June.

This was a very busy week, and this itinerary was actually covered a couple of years before the weekend trip.  I’m not going to go into deep details about every thing and every place, rather I’m just going to lay out what we did so that you can take it for what it is and use it as your own itinerary, or for ideas to create your own trip.  This starts in Boston, MA late in the afternoon.

We tend not to stay at the high-dollar hotels/motels/inns as we’d rather put that money towards fine dining and meals we wouldn’t normally get or eat back home.

If you think that New Hampshire is a small state and there’s not a lot to do, this itinerary proves otherwise.

Images from this trip can be found on Laughing Frog Images here and here and here

DAY 1:

Dinner: Warren’s Lobster House, Kittery, ME.  Just because it’s been there forever and a day, and I first ate there back in 1971 or 1972.  It hasn’t changed much…

Stay: Your choice.  We based ourselves in the Fairfield Inn in Portsmouth for the first three nights.   Day 2 is backtracking, but at least we weren’t packing and unpacking…

DAY 2:

Tourist Day: Salem, MA.  The drive on Route 1 and detours along the coast are a journey of their own.  Witches.  Peabody Essex Museum.  House of Seven Gables.

Lunch: Red’s Sandwich Shop, Salem.

Dinner: Go to a lobstah pound.  Markey’s Lobster Pool or Brown’s Lobster Pound in Seabrook, NH.  Which one might be dictated by which line is the shortest…

Stay: See Day 1.

DAY 3:

Photo Stop: Cape Neddick Light / Nubble Light. York, ME.

Photo Stop & Walk: The Marginal Way.  Ogunquit, ME.

Lunch: Barnacle Billy’s.  Ogunquit, ME.

Cruise: Portsmouth Harbor Cruises.  Portsmouth, NH.

Dinner: Jumpin’ Jay’s Fish Cafe.  Portsmouth, NH.  If the mustard-crusted cod is on the menu that night….!

Stay: See Day 1.

DAY 4: Hit the road!  Early!

Drive to Conway, NH and make a left on the Kancamangus Highway (Route 112).  Photo stops as you wish.  Might want to get some snacks before you make that left, because once you do, there’s nothing ’til Lincoln.

Lunch (could be a late one): Gordi’s.

Train stop: The Hobo Railroad is in Lincoln.

Take I-93 north.  Consider the following along the way:  Clark’s Trading Post, The Flume Gorge, and the Cannon Mountain Aerial Tramway if the weather is cooperating.

Stay on I-93 North to Littleton, NH.

Stay: Thayer’s Inn.  Littleton, NH.

Dinner and a Martini: Baliwick’s Fine Restaurant.   Littleton, NH.

DAY 5:

Breakfast: Littleton Diner.

Wander ’round Littleton: Chutters (world’s longest candy counter) or Fresh Salon and Day Spa for a (couples) massage.  Littleton is a great, friendly small town, and a reminder that there is life outside the city.

Train Ride:  Just outside of Bretton Woods, NH is the Mount Washington Cog Railway.  You have to once in your life!  They still run one trip a day with a steam engine!

Dinner: Libby’s Bistro (check days and hours first!)  Gorham, NH.

Stay: Somewhere in Gorham – just don’t drive back to Littleton like we did!  It’s too long of a drive after a fantastic meal.

DAY 6:

Train Ride: The Notch Train on the Conway Scenic Railroad.  If you can make it happen, get seats in the Dome Car.

Dinner: Bernerhof Inn (it was a German restaurant at that time, but still looks interesting).  Glen, NH.

Stay: Where we stayed has changed, so you could stay at the Bernerhof.  It looks like the Golden Apple Inn is within walking distance…

DAY 7:

Free-form day.  We spent it in Crawford Notch and along Route 16 on the east side of Mount Washington.

DSCF5580 LF FB

Dinner: Red Parka Steakhouse & Pub.  Glen, NH.

DAY 8:

Breakfast: Glen Junction Family Restaurant.   Glen, NH

Next stop: We drove east to Portland, ME and checked out Portland Head Light and the surrounding parks.

Lunch: Don’t remember where we ate at back then, but now Eventide Oyster Company in Portland is a must!

Dinner: Kelly’s Roast beef on Route 1 in Saugus, MA, just north of Boston and Logan Airport.  Yes, we slept on the flight home…

We hope you find this helpful in planning your travels, now or whenever the time comes.

Weekend in New Hampshire

This itinerary is based on a trip to (1) photograph fall foliage, (2) eat well, and (3) relax, but it can work any time! It is a busy itinerary, so you can take it for what it is, or for some ideas for your own itinerary. You might decide this is a good week-long trip instead of a weekend.  Depending on where you live and how flexible your schedule is, there’s as much luck involved as there is planning to catch the leaves in their prime.

Starting point: Boston on a Friday morning (you can also start this trip in Portsmouth, NH instead of Boston – this gives you another hour or so to photograph on the first day of the trip).  Take Route 1 north and head to breakfast in Salem, MA at Red’s Sandwich Shop (insert website). If you’re lucky, you’ll find the lobster omelet on the menu. It’s decadent, and you’ve got to do it at least once in your life.  From there, make your way via Route 114 to I-95 and head north. You’ll be on 95 until you reach the Spaulding Turnpike / Route 16 in New Hampshire – and you’ll head north/northwest on that as well to Conway, NH.  You’ll soon enter the White Mountain National Forest.

Your next turn is a left on the Kancamangus Highway a.k.a. Route 112. There will be numerous photo opportunities on your right as you follow the Swift River. There are places where you can safely pull off the highway and make your way to the river’s edge for photos.  Three must do locations are: Albany Covered Bridge, Rocky Gorge Park (don’t think about swimming) and the Lower Falls Scenic Area . There’s also a scenic view near the summit that provides a broad vista.  Once your cross the summit, there aren’t as many opportunities, as the views tend to shift to the south side of the road, which would have you shooting into the sun.

DSCF4997~1 blog

As you head into Lincoln, it might be time for lunch. While there are probably other great places to eat, we’ve had some great meals at Gordi’s.  If you’re into trains as well as leaves, the Hobo Railroad is in Lincoln.

Your next run is going to be a right: I-93 north.  Consider the following:  Clark’s Trading Post, which has a bear show and the White Mountain Central Railroad, The Flume Gorge (easy hike and well worth it), and the Cannon Mountain Aerial Tramway if the weather is cooperating.

Take I-93 North to Littleton, NH.  The Frog has been staying at Thayer’s Inn in Littleton for over 20 years.  Thayer’s has been there since before the Civil War.  There’s probably not a square corner or a level floor in the place.  It’s neat, it’s quirky, it’s got stories, history, and some say, ghosts.  Baliwick’s Fine Restaurant features great food and an extensive Martini Menu! Dinner and a beverage followed by a short walk to your room are a great way to end the day.

Saturday morning can be spent wandering through Littleton. One can head to Chutters (world’s longest candy counter) or Fresh Salon and Day Spa for a massage – but start your morning at the Littleton Diner – their corned beef hash is without peer.  Last we heard, the Littleton Grist Mill store had closed (lost their lease) but they still have their website.  Littleton is a great, friendly small town, and a reminder that there is life outside the city.

Once you’ve decided that it’s time to move on, it’s time to head north and east to Lancaster via Route 116 and Route 3 where you can stop in at Fuller’s Sugar House where you can sample maple sugar in the same manner as some do wine! Hint: don’t look down your nose at Grade B maple syrup. Our first perception was it couldn’t be as good as Grade A if for no other reason than it was called “Grade B.” Well, we were wrong, and we left with a half-gallon of Grade B to prove it. It’s thicker, darker, and more dense, and preferred by many for cooking and baking purposes. And, a spoonful once in a while will cure any sweet tooth!

From Lancaster, it time to head southeast to Gorham via Route 2. Along the way, there will be several photo opportunities to capture the Presidential Range. You might even see Mount Washington in snow in early October!

The destination in Gorham is Libby’s Bistro (check days and hours first!) – a fantastic restaurant that you might expect to find in a trendy neighborhood in any major metropolitan area – but not necessarily in Gorham, NH.  Go, enjoy, and indulge. You’ll probably want to stay in Gorham, as driving will not be high on your list of things to do after your dinner.  We don’t have any specific recommendations for where to stay in Gorham, but after our first visit to Libby’s we learned that we didn’t want to have to drive back to Littleton after dinner!  There’s also a railroad display and museum at the old Grand Trunk depot in Gorham.

Next morning, you might want to eat breakfast in Gorham, especially if it is a nice day, as you can spend a lot of time photographing your way south along Route 16 as you head south to Conway to finish your circle trip.

Along the way, you’ll pass the Mount Washington Auto Road on your right – a drive of your life if you’re up to it. If you don’t want to drive, you can be driven up in a van. Either way – a trip to the top of Mount Washington is well worth it!  It’s the highest peak in the northeast, it’s got some of the worst weather in the world, and chances are, the weather will be different up top!

On your left will be the Glen Ellis Falls on the Ellis River in Pinkham Notch.  Well worth the stop and short and sometimes steep hike to the bottom of the falls. If you don’t want to head down to the base of the falls, there are photo opportunities along the river and at the top of the falls. If you do head down, be prepared for both you and your gear to get wet from the spray.

Continuing south, you’ll come to Glen, NH. Make a quick right and head to Glen Junction Family Restaurant for lunch. If they’re still serving breakfast, the pumpkin pancakes with maple cream are well worth the calories, whatever they may be.

From there, check the clock and figure out where you have to be and when.  You’ll continue south on Route 16 to Conway to complete the circle, and head back to your reality.  If you have time, the Conway Scenic Railroad in North Conway is worth the stop if time permits.

And that’s an example of a weekend in New Hampshire.  We’ve done it.  It’s busy, and it’s fun.  If you have never explored New Hampshire and the North Country, you could spend a week there.  But… that’s a separate post.

And, if you can’t make it – you can check out the image galleries and get a picture, a mug, a phone case, or an aluminum print from Laughing Frog Images and tell everyone what a great time you had in New Hampshire (but we’d appreciate you fessing up and referring your friends to the Frog!).

Feather River Express video clips

The Frog shot some short video clips of the Feather River Express and Keddie Flyer / Keddie Dinner Train.

They were taken without a tripod (I know better, but I couldn’t keep it with me on the train, so that explains it for two of the three clips).

What these clips do give you is a brief glimpse of what some passenger trains that ran in the west looked like in the 1950’s and 1960’s.

You’ll see vintage railcars from the original California Zephyr and Santa Fe’s famous Super Chief as they are switched and spotted at the Western Pacific Railroad Museum and at the station in Portola.

You’ll see and hear Western Pacific GP-7 #707 as she switches the cars.  The 707 was build by the Electro-Motive Division of General Motors in 1952.  (Yes, GM was everywhere…)  She’s got 1500 horsepower put out by a V-16 diesel engine, and weighs about 126 tons.  In other words, she won’t win a drag race, but she can pull the freight.

Check out the videos on the Laughing Frog Images YouTube page and take a trip back in time.

Here’s the rest of the Feather River Express that you won’t see in the video:

WP_20140809_11_13_41_Raw FB

(For the technically curious, the videos were taken with a Lumia Icon smartphone.)


The Feather River Express

Last weekend, The Frog rode the Feather River Express IV, a private train chartered by Trains and Travel International and operated by Amtrak over the Union Pacific Railroad.  The train ran from Emeryville, CA to Sacramento over the rails of the former Southern Pacific Railroad, and from Sacramento to Portola, CA over the rails of the former Western Pacific Railroad.  The timing of the trip coincided with Railroad Days in Portola, complete with a parade!

DSC_5441 fb

The Western Pacific Railroad (“WP”) operated the famed California Zephyr (“CZ”, “Silver Lady”) in conjunction with the Denver and Rio Grande Western (“Rio Grande”) and Chicago, Burlington and Quincy Railroad (“CB&Q”, Burlington, or, simply, the “Q”).  The train ran between Chicago, IL and Oakland, CA.  The Q took the train from Chicago to Denver, CO.  The Rio Grande took her west to Salt Lake City, UT.  The WP carried her from Salt Lake to Oakland.   The Silver Lady was the first train with regularly scheduled Vista Dome service.  You can read more about the past and present CZ operated by Amtrak here.

Our train was made up of private vintage railroad cards from several owners.  The Frog elected to do the trip “old school”.  When the CZ was new back in 1949, most cameras had exactly one lens, used film, and most folks photographed in black and white simply because it was cheaper than shooting in color.  So, out came the D-90 and the 35mm lens.  And that’s how the trip was documented – one camera and one lens.  No all-in-one zoom, no mega-zoom, no wide-angle.  Strictly old school.

As the trip ended last Sunday, the images have just been uploaded to the hard drive and the real work is beginning – selection, straightening, conversion and preparation for uploading to the galleries.  Look for three new galleries to be added – Eastbound, Westbound, and the Western Pacific Railroad Museum, which is located in Portola, CA.

Stay tuned for the new posts and galleries, and don’t forget to subscribe to new posts by clicking the link below so you don’t miss a thing!

Thanks for visiting, and remember, Christmas is just four months and 8 days away.  Don’t forget Laughing Frog Images when you’re looking for that unique gift for someone (or yourself!)


Third-Party Camera Lenses: Yes or No?

Some folks swear that the only way to get good pictures is to only purchase lenses from the maker of your camera body.  The Frog begs to differ.  There are some great third-party camera lenses out there!

Some third-party camera lenses are as good as the lenses from the camera manufacturer’s, some are better, and quite honestly, some are just plain bad.  Keep in mind that the lens can be the weak point in your system, so do your research and get the best lens you can!

First, whether your camera body is made by Nikon, Canon, Sigma, Pentax, Sony, Panasonic, Leica, or whomever, they’ve all got good lenses.  Similarly, so do lens makers like Sigma, Tamron, Tokina, and others.  Do your research!

Here’s a suggested approach to buying any lens:  First, identify what you want.  Then, check out the manufacturer’s websites (links above), check out Ken Rockwell’s site and Digital Photography Review.  Check out buyer reviews on retailer sites such as B&H and Adorama.

Look at the results, and study the QFLs.  Look at price.  You might find it helpful to keep notes or make a table to track your findings.

In the case of All-in-One lenses, recognize that none of them are perfect, no matter who makes them!  They’re great as long as you know their quirks, flaws and limitations (“QFLs”) – and your work within them.  You might find that the third-party lens that costs half as much as the manufacturer’s lens has some QFLs that are different than the QFLs that the manufacturer’s lens has.  And, for half the price, you can live with that!  (In one instance, The Frog did that and ended up with two third-party camera lenses for the price of one manufacturer’s lens.) That said, if the price is too good to be true, it probably is…

Keep an eye out for specials, rebates, and package deals, especially before major holidays.  You can save $$ if the timing works for you.

And… you probably know what’s coming… don’t forget to check things out at your local camera store!

You know that the Frog is shooting with Nikon DSLR bodies.  So, whose lenses does he use?  Nikon,  and third-party camera lenses from Sigma, and Tamron.